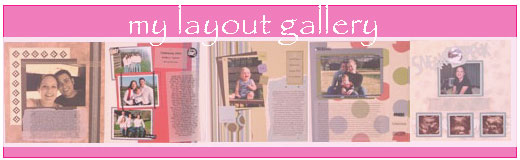
Paper Bag Scrapbooks
Instructions, Photos and Project Ideas
Well, I’ve made two paper bag scrapbooks now – a brown fold-out book and a white basic bag book. They both turned out so cute! I can only say that because I got so many great ideas out of the instruction book I used; it's called The Paper Bag Book Before I opened that book I’d only seen paper bag scrapbooks at a distance at my local scrapbook store, but they had always intrigued me. I am so glad I ordered The Paper Bag Book. I am already planning a couple more projects.
So, let me show you what I learned about paper bag scrapbooks…
See another of my paper bag scrapbooks
Basic Paper Bag Scrapbooks - Step-by-step instructions
1. Choose a group of photos and a theme for your album.
2. Gather paper, supplies and embellishments to coordinate with your photos.
3. Choose white or brown bags based on your color scheme and photos. You
can use any color basic paper bag you have. I’ve only worked with white
and brown so far. I found my white bags at a party store; they were
actually called cake bags. And I got my brown bags at my local liquor
store. Regular lunch size brown bags were too small for my photos. So,
think about size as well.
4. This is the easiest one of the bag books to make. Simply lay the bags
on top of each other face up with the top of the bags to the right.
Think through your project and how many photos you have and how many
pages you will need. Lay that many bags together and choose a binding
method. I chose punched holes and ribbon tags for both of my paper bag
scrapbooks.
5. Bind your bags together. I used ribbons, but the book suggested stitching, brads, comb bindings and 9 other methods.
6. Decorate your cover. This is what will define the over-all look of
your album, so have fun! Make sure you give your book a title. See
photos below.
7. Create your layouts as you would with your normal layout design process.
It really is that simple! : ) But I did get some great ideas for spicing up my projects from
The Paper Bag Book! I didn’t use any hidden journaling or secret
pocket techniques, but there are some great ideas in the book. Don’t
forget to look at my Basic Bag Book below.
Basic Paper Sasck Scrapbooks - Examples
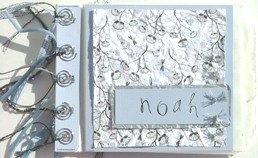

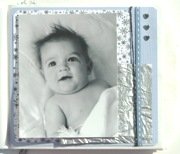
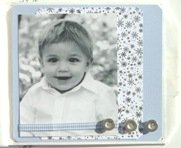
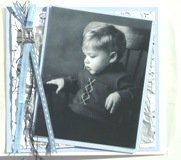
I did this project with some formal portraits of my son Noah. They are
his 3, 6, 9, and 12 month pics and I wanted them to have a special scrap
project to display them. Paper bag scrapbooks are the perfect theme
albums for this type of thing.
So, I chose white bags to provide a clean backdrop for the layouts. Then
I got online and chose my supplies – paper and embellishments. I stuck
with black and white patterned paper and blue Bazzill cardstock. Sweet,
simple and classic was my idea. For inspiration, I just looked at all of
the incredible examples in the book.


Basic Paper Bag Scrapbooks - Project Ideas
There are so many theme albums that would be perfect for this project.
If you don’t already have a group of photos or a theme in mind, here are
some ideas:
An album about your house – your favorite spots, why you bought it, what you love about it, etc…
A gift album for husband, friend, relative…answer the statement “What I Love About You!”
Grandma’s Brag Book – use first year or first month or first anything photos of your child.
Use gift bags instead of lunch bags for a birthday theme album.
Gather up photos of you and your best friend and create matching paper sack scrapbooks. You’ll each have a piece of each other.
Brown paper bags make awesome heritage-theme projects.
Scrap your vacations.
Make a time-lapse album. Collect pictures of the same event, person, or place over the years and show the changes over time.
Engagement photos or pics of a bridesmaid’s luncheon would be perfect for paper bag scrapbooks.
Or…how about taking photos of your scrapping room or space and
journaling about why you love your space…or what you dream it will be in
the future. : )
Have fun brainstorming and planning your own ideas for paper sack scrapbooks. Let me know how they turn out!


New! Comments
Have your say about what you just read! Leave me a comment in the box below.