click here
and read back issue July 2013 to see the full version.
Hey, Ya'll,
I've been cleaning and organizing like a crazy woman this week! Well, it started with my Kitchen. It really needed some organizing. Over the years, my cabinets had gotten really cluttered and there were lots of things I really didn't use any more and the cabinets really needed to be wiped out too. So, I did a "crisis cleaning" as Flylady calls it. This was not baby steps. I just got it done! I stayed up really late 1 night and I really felt it the next day. So, I forced myself to go to bed early 2 nights in a row and get some extra sleep. I'm doing my best not to "crash and burn" but I am working more than usual on cleaning and decluttering.
Yesterday I started on my scrapbook space. It too had gotten cluttered and I had just stuffed things in drawers. So, I got everything out and reminded myself what I actually have. I cleaned out the bottom of my coat closet and put some plastic drawers in there. I rearranged and put like things together. My next project is to go through "spare" photos and match them up with memorabilia (if there is any to go with that photo/s) and have them ready for when I have some baby step time to work on a layout. Recently, I've realized that when I do have some "spare" baby step time, I sometimes get lost in the photos and stuff and I'm not sure what to work on. Lord willing, now I'll have some projects already "thought out" a little and ready to work on.
I do clean and declutter normally and baby steps do get things done but sometimes it feels good to just "dig in" and "get 'R' done" : )
Hope you enjoy the scrapbook layouts this month!
What's New?
YouTube Videos
Scrapbooking on a Budget
Pregnancy Scrapbook
Scrapbooking TV
Wanna find something on my site? - I have a search box, yeah!
SEARCH BOX
Ways to keep in touch -
My website!
My Blog!
My YouTube Channel!
My Facebook Page!
Pinterest!
Also, let me know what you’d like to see included in upcoming issues. Send me a line at rachel@free-scrapbooking-ideas-and-videos.com. You might have to go through my contact page at the main site because that address has heavy spam filters on it...I might not get it if you just send it from your email program. : )
For Member’s Only…
When you subscribe to The Real-Life Scrapbooker’s Resource, you get access to all of the back issues. Every issue is filled with exclusive layouts and ideas. You won’t find any of the layouts or card designs anywhere* on free-scrapbooking-ideas-and-videos.com so it’s a FREE Member’s Only area. Every month you can count on fresh, free ideas for your scrapbooking! And here’s another thought. Every month, put the new issue in a folder in your email software and when you sit down to scrapbook, you’ll have tons of ideas right at your fingertips.
* Disclaimer: I don't put links to any of the layouts or cards from my e-zine issues but search engines do find them...including my own on this site. I've decided to keep it this way 'cause it helps my traffic. How's that for a "real-life" disclaimer for you? : ) There's also 1 set of my YouTube videos where I show a good bit of a paperbag scrapbook that I featured in an e-zine edition. I do the very best I can to give you fresh content each month. Thanks!
Subscribe to The Real-Life Scrapbooker’s Resource
Girlfriends Scrapbook Layout
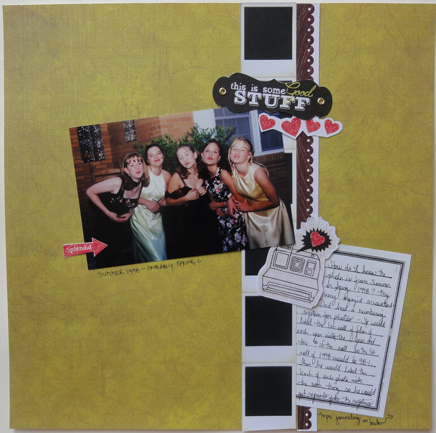
This one was so much fun! I dug way back in my memories for this one...about 15 years...to my teenage/girlfriend days. : )
I used a yellow/green textured background paper. Then for most of the embellishments I used cut outs from the paper pack I'm using for
my 2013 Project Life Inspired album.
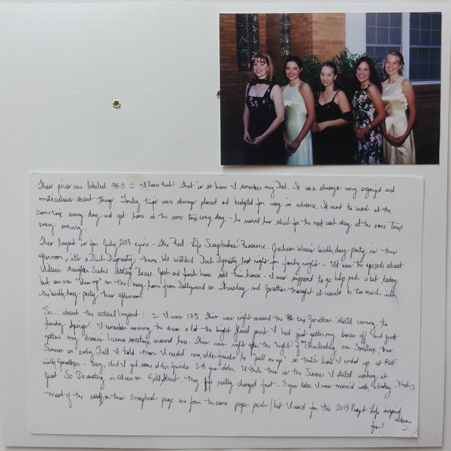
I used the polaroid strip and the border strip to form the vertical line about a 1/3 of the way in from the right of the page. Then, I used the principle of visual triangles that I learned from Noell Hyman to make the photo the focal point. Do you see the 3 hot pink embellishments forming a triangle around the photo? The title piece and the camera also came from the paper pack. For the journaling block, I used a stamp I have and stamped with black ink onto white card stock and then cut it out. It was small for what I wanted to say, so I finished my journaling on the back. And then as I was going through some other stuff, I found a photo that goes with this one, so I just attached it to the back as well. : )
Supplies:
Background paper: from the DCWV - Die Cuts with a View paper pack called The Old World Stack...got it at Michaels
The embellishments/cut-outs are from the DCWV - Die Cuts with a View paper pack called The Snapshot Stack
The journaling block stamp is from Stampabilities - Journaling Block OR1025. I think I got it at Hobby Lobby and it was a long time ago.
Liberty Rollers
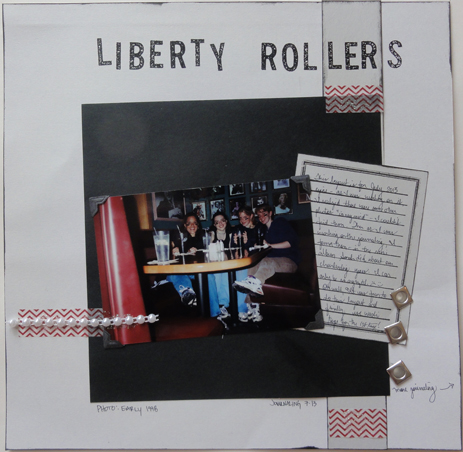
Ahhh...more photos from the teenage days. There were 4 of us that hung out a lot. We had fun a couple of times rolling some friend's houses. One night, afterwards we went to Applebees and got Cokes. I had 3 photos I wanted to include but as I tried to lay them out, I just couldn't find a way to make it look good. So, I just attached 2 of them to the back of the layout. I wanted to keep them together and I wanted to remember the things in the photos (the decor of my Mom's house then) but they just didn't make a nice looking layout. So, now I have the best of both worlds...a nice looking layout on the front and all the photos on the back.
I used plain white card stock (actually, I think it is a very thin piece of packaging card board that I cut to 12x12). Next, I added the grey vertical strip...before I attached it, I inked around the edges with black ink). Then, I added the large, black square card stock. I used black photo corners to attach the 4 x 6 photo. I did the title with black rub-ons. I stamped the journaling block with the same stamp as the 1st layout. I used Washi tape for the 1st time!!! See the visual triangle the Washi tape makes? ...the red chevron strips.... I used some glitter glue and smeared it on top of each strip. On the bottom left strip of Waship tape I used the glitter glue to attach the strip of pearls...I got those at Walmart (I think) in the jewelry making section or craft section a long time ago. Finally, I added the super-large silver eyelets/brads.
Supplies:
Background paper: white card stock/packing card board
Rub-ons: Making Memories Hudson black
Washi tape: Recollections brand from Michaels
Eyelets: Creative Imaginations Extreme Eyelets - from my LSS a long time ago
Journaling block: same stamp as the first layout above

What about next month?
You just never know. We'll see...stay tuned to
Youtube
to find out.
Until sometime around the middle of August
Send Me Your Layouts...
I’d love to see what you’ve been up to. I’ll pick 2 or 3 for each issue and publish them along with your photo (if you want) and a bio about your real life scrapbooking adventures. So, send them to Rachel@free-scrapbooking-ideas-and-videos.com with “e-zine layout submission” in the subject line.
|
